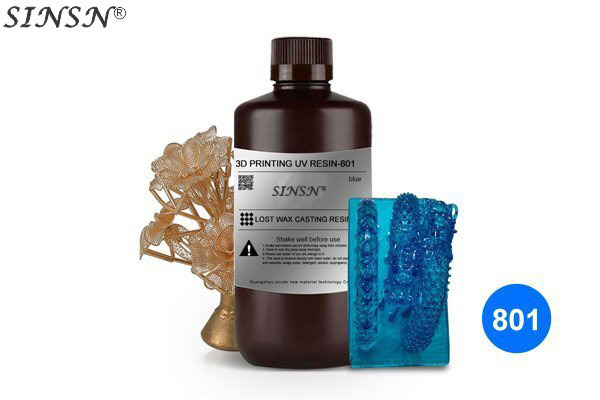
Lost wax casting resin 801
Name:Sinsa3D Blue cast
Model: 801
Colour: Blue
Type of packing: Plastic bottle
Packing specification: 500g/1000g
light source:LCD/DLP printer for 365-405nm
Lost wax casting resin 801
PRODUCT DETAILS
From retailers and designers who produce custom jewellery to large-scale foundries, jewelers can use Sinsa3D brand cast resins to expand their business.The high precision and smooth surface finish of Sinsa3D casting series resin allows you to go directly from design to production.
Features
801# Lost wax casting photosensitive resin is a blue casting resin with a wax content of 50%, complete combustion, no ash, and low expansion. It supports a variety of paraffin casting conditions and is compatible with high-quality gypsum to enhance the excellent effect of using gypsum outsourcing to cast jewelry.
Moreover, due to the addition of a special curing agent, the 801-type photosensitive resin has excellent hardness and rigidity, and can print ultra-fine gold and silver jewelry very well.
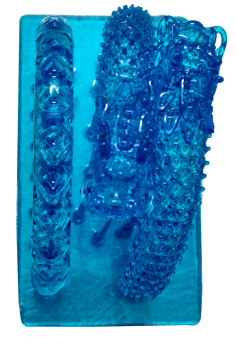
Blue wax jewelry model
FEATURES
801# Lost wax casting photosensitive resin is a blue casting resin with a wax content of 50%, complete combustion, no ash, and low expansion. It supports a variety of paraffin casting conditions and is compatible with high-quality gypsum to enhance the excellent effect of using gypsum outsourcing to cast jewelry.
Moreover, due to the addition of a special curing agent, the 801-type photosensitive resin has excellent hardness and rigidity, and can print ultra-fine gold and silver jewelry very well.
Material property data
PROPERTY | Unit | PROCEDURE | Results |
Viscosity | (cps@25℃) | 150-220 | |
Critical exposure energy | ( mJ/cm2 ) | 8.9-9.5 | |
Tensile Strength | MPa | ASTM D638 | 36-52 |
Tensile modulus | MPa | ASTM D638 | 1,500-1,800 |
Elongation | % | ASTM D 648 @66PSI | 4-8 |
Heat distortion temperature | ℃ | 50 | |
Shore hardness | D | 78 |


Example picture 01# Example picture 02#
Jewelry model Jewelry model
Material property data
PROPERTY | Unit | PROCEDURE | Results |
Viscosity | (cps@25℃) | 150-220 | |
Critical exposure energy | ( mJ/cm2 ) | 8.9-9.5 | |
Tensile Strength | MPa | ASTM D638 | 36-52 |
Tensile modulus | MPa | ASTM D638 | 1,500-1,800 |
Elongation | % | ASTM D 648 @66PSI | 4-8 |
Heat distortion temperature | ℃ | 50 | |
Shore hardness | D | 78 |
RECOMMENDED PRINTING PARAMETERS
Item | Test results |
Printing layer thickness | 0.035-0.05mm |
Number of printing layers | 3-5 layers |
Bottom exposure time | 30 seconds/layer |
Exposure time | 5 seconds/layer |
Item | Test results |
Phrozen Sonic Mini 4K | 6.1‘’ 4K LCD 3D printer |
Layer thickness | 0.03mm |
Number of printing layers | 6 layers |
Exposure time | 5s/layer |
Bottom exposure time | 8s/layer |
Lifting distance of bottom layer | 5mm/layers |
Lifting distance of bottom layer | 5mm |
Lifting speed of bottom layer | 40mm/min |
Notice:
Material properties depend on the equipment light source, printing parameters, ambient temperature, post-processing, etc.
The final effect depends on the actual use of the user, this table is for reference only.
About operation
Printing
Before use:
Shake the liquid resin evenly before use,Please wear gloves to clean the resin tank and the molding platform and keep the bottom of resin tank in light transmission.

When using:
Pour the 801 resin into the resin tank of the 3D printer, and import the dental model into the printer for printing.

After use:
After printing, please use the matching tools for post-processing, including blade, diagonal pliers, tweezers, containers, gloves; ethanol (≥95%).
Washing
Remove the custom tray from the build platform and soak in IPA(isopropanol) or ethanol(≥95%) to remove the extra resin. Use an ultrasonic cleaner if necessary. Please be aware that IPA and ethanol must NOT be placed directly in the tank of the ultrasonic cleaner.
Removing Supports
Manually snap off or use a flush cutter to snip away the support structure from the printed model. Using the flush cutter, cut the supports as close as possible to their attachment points on the model. Be careful not to nick the model itself, as this can cause pitting that may be difficult to remove during sanding.

This picture comes from the Internet
Post-curing
For post-curing, the curing energy and curing time depends on the post-curing unit. For example, a good surface hardness can be achieved by 10 minutes of post-curing using a 36W (12WCCFL + 24W LED) UV curing box at 405nm or using Formlabs FormCure curing box at 405nm at 60°C for 15 minutes.
Polishing
Polish the surface using polishing paper or a rotary tool with a buffing attachment. Do not finish the print with mineral oil after sanding.
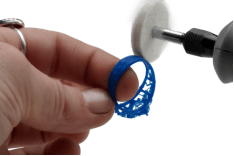
This picture comes from the Internet

Casting
01、Try to make the wall thickness of the model thinner, and not too thick.
02、Using the three-dimensional casting gypsum powder of the American SRS and Hunter brands.
03、The printed model must be cleaned and the model must be cured twice. The surface of the model and the mold on the inner wall of the non-stick plaster powder must be dry.
04、After wrapping the model in plaster, leave it for 24 hours. After the gypsum has dried to be free of moisture, it is then calcined. Direct sintering without drying will cause the gypsum to crack.
05、Heat the muffle furnace to 500-600°C, then put it in the plaster mold, heat it to 780-850°C and keep it for 4 hours (it is recommended to keep the heat preservation for 2 hours after turning the plaster mold for 2 hours, the wax mold will be sintered more evenly and cleanly)
06、After sintering, take out the plaster mold from the high temperature furnace and pour the metal.

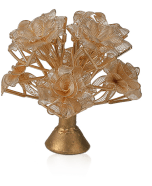
instructions
lShake well before use and then pour into resin tank;
lDuring the use, wear protective gloves and keep the room ventilated;
lThis product contains reactive chemicals, avoid contact with eyes, skin and clothing;
lThis product have slight irritation on eyes and skin. If you contact your eyes inadvertently, rinse immediately with plenty of water and seek medical advice in time;
lPlease wash with soapy water immediately after contacting with skin; wash thoroughly after contacting with clothes before wearing;
lKeep the product away from pregnant women and children.
Storage and transportation
lThe resin should be sealed and stored in the original package at home temperature in a dark area to avoid high temperature and sunlight.
lThe recommended temperature is 18-35℃, a low temperature may affect the printing effect, the resin can be properly preheated before use (not more than 35℃).
lAfter printing the resin, the resin left in the tank of 3D printer should not be mixed and used with the unused resin. It should be stored in another light-proof container.
lFor safety information, please refer to the MSDS of this product. If you encounter any problems during use, please feel free to contact us.
